

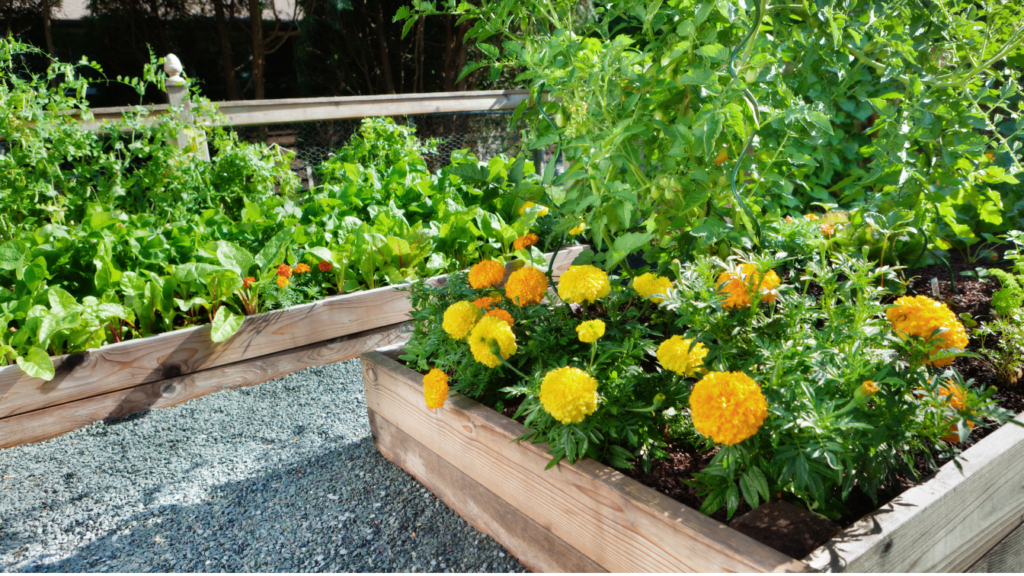
Ever dreamed of growing your own veggies but worried about bad soil or small space? DIY raised garden beds are the answer. They let you control the soil, extend growing seasons, and make upkeep easy. This guide will help you build strong raised beds without spending a lot.
Materials can cost between $90 to $300. You can use wood like cedar or redwood, lasting 10–20 years. Popular 4×8-foot beds, 16½ inches tall, fit well in small areas and need little lumber. Let’s get started on your garden today!
Key Takeaways
- DIY raised garden beds cost $100–$300 depending on materials and size.
- 4×8-foot beds with 16–18-inch height work best for most vegetables.
- Redwood and cedar last 10–20 years, while pine may wear faster.
- Space beds 36–48 inches apart to allow room for maintenance.
- North-south orientation maximizes sunlight for healthy plant growth.
Benefits of DIY Raised Garden Beds
Switching to a DIY raised garden bed changes gardening for the better. These beds let you control soil and water, making plants thrive. They also make gardening easier and keep pests away. Let’s look at how these benefits improve your garden.
| Traditional Gardens | DIY Raised Garden Beds |
| Soil varies by location (e.g., Florida’s sandy soil) | Customizable with best soil for raised garden beds mixes |
| Constant bending and kneeling | Less strain with elevated designs (1–3 ft tall) |
| Higher weed and pest pressure | Weeds reduced by 80% with weed barriers |
Improved Soil Control and Drainage
With a diy raised garden bed, you pick the soil mix. Use organic compost, perlite, and best soil for raised garden beds for better drainage. Plants in raised beds grow twice as tall as in-ground ones. Add cardboard at the bottom to block weeds and pests.
- Soil warms 2–3 weeks earlier in spring
- Prevents waterlogging with proper drainage holes
- Reduces soil compaction from foot traffic
Extended Growing Season
Raised beds start and end the growing season earlier. Soil thaws faster, letting you plant 3–4 weeks before ground soil. In Florida, sandy soils mixed with compost keep nutrients better. Use frost blankets to keep harvesting in the fall.
Reduced Back Strain and Easier Maintenance
Elevated designs make gardening easier on your back. Beds 12–18 inches tall reduce knee strain by 70%. Mulch and barriers cut weed time by 60%. One gardener saved 5 hours weekly on gardening.
Protection from Pests and Lawn Equipment
Wooden walls keep rabbits and gophers out. Hardware cloth liners stop burrowing pests. Raised beds also avoid lawn mower damage. A study found 95% fewer pest intrusions in beds over 12 inches tall.
Planning Your Raised Garden Bed Project
Before you start digging, planning is key for a successful garden. Create raised garden bed plans that fit your space and goals. First, check the sunlight: most veggies need 6–8 hours a day. Stay away from shady spots under trees or near fences. The Almanac Garden Planner offers a 7-day free trial to help plan your garden digitally.
- Prioritize open areas with unobstructed sunlight
- Leave 36–48 inches between beds for easy access
- Reference community garden examples like Escalon’s 41’ x 30’ layout for spacing inspiration
Determining the Optimal Size and Height
- Stick to 3–4 feet in width for easy center access
- Standard heights of 3 feet work for most crops; adjust for accessibility needs
- Use square-foot gardening’s 4×4-foot blocks to maximize small spaces
Creating a Budget and Timeline
- Start small with a single bed if space or funds are limited
- Save money by using cedar fence pickets (costing up to 50% less than full planks)
- Budget-friendly diy raised garden beds on a budget projects can cost under $50 per bed using reclaimed wood or cinder blocks
- Allow 2–3 weeks for construction and soil prep, starting 6–8 weeks before planting season
Begin with a 4×8-foot bed for beginners, then expand as confidence grows. Layer compost and topsoil to reach 10–12 inches of depth, ensuring roots thrive. With these steps, even first-time gardeners can create functional layouts that balance cost, space, and sunlight needs.
Best Materials for Raised Garden Beds
Choosing the right materials is key to a long-lasting garden bed that’s safe for plants. Best materials for raised garden beds include rot-resistant wood like cedar and redwood. These woods naturally fight off decay and insects, lasting 10–20 years. Cedar is easy to find in the eastern U.S., while redwood is a favorite in the west.
For easy raised garden bed DIY projects on a budget, pine or fir are good choices. These softer woods are cheaper but might last 3–7 years.

- Cedar and redwood: Durable, low-maintenance, and naturally pest-resistant.
- Pine/fir: Affordable but require regular maintenance in wet climates.
- Pressure-treated wood: Opt for Micronized Copper Azole (MCA) formulations. Avoid older Chromated Copper Arsenate (CCA), banned since 2004). Oregon State University research confirms MCA-treated lumber doesn’t affect plant safety when properly installed.
Non-wood options include galvanized metal (durable but costly) or concrete blocks. Seal concrete blocks with polymer paint to reduce potential fly ash leaching. Recycled materials like stacked stone or bricks add eco-friendly style. Always avoid untreated wood in direct soil contact to prevent rot.
“Pressure-treated lumber with MCA shows no harmful plant copper uptake,” according to a 2023 study on raised bed safety.
For longevity and safety, pair material choices with your climate and budget. Untreated wood needs annual checks, while composites offer beauty with less upkeep. Choose materials that meet your easy raised garden bed DIY needs and last long.
Raised Garden Bed Design Ideas
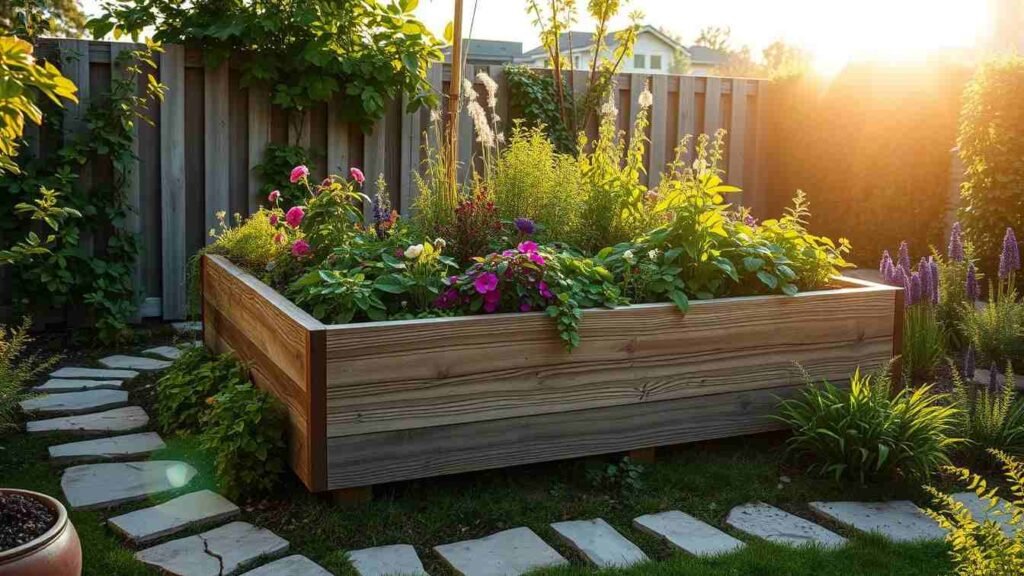
Customizing raised garden bed design ideas lets you adapt to any space. Start with a diy raised garden bed that matches your garden’s needs. Whether you prioritize aesthetics, accessibility, or space efficiency, there’s a design for you.
Classic Rectangle Designs
The 4×8-foot layout is a timeless choice. It uses three 2×6-inch boards to create a 16.5-inch height, perfect for most plants. This design is great for beginners and saves lumber.
Pair it with pea gravel paths for better drainage. This setup has been successful for over 20 years.
Tiered and Cascading Options
Slope-friendly designs use stepped levels to make the most of vertical space. Add hardware cloth bottoms to block pests and keep soil airy. Tiered beds are perfect for sloped yards, directing water runoff away from lower levels.
Unique Shapes and Layouts
| Design | Features | Benefits |
| Keyhole Gardens | Circular with central compost tower | Compact, nutrient-rich soil |
| Hexagonal Beds | Angular shapes for garden pathways | Space-saving, artistic appeal |
| Vertical Trellises | Attached to beds for vines | Increases yield in tight spaces |
Accessible Designs for Limited Mobility
- Elevated beds at 16–19-inch heights reduce bending
- Incorporate seating into bed edges for comfort
- Narrow 3-foot widths ensure easy plant access
These options align with ergonomic principles, ensuring comfort during planting and harvest.
Tools and Supplies Needed
Starting a easy raised garden bed diy project? First, gather these essentials. You’ll need a miter saw or circular saw, drill, measuring tape, and sturdy gloves. Redwood or cedar boards resist rot, and 3-inch galvanized screws prevent rust.
For pest protection, use hardware cloth to secure the base against gophers.
Optional upgrades like sawhorses and corner clamps can speed up assembly. To save money, check HomeDepot or local lumber mills for scrap wood. Thrift stores often sell used drill bits and screws at discounts.
- 2×6 redwood planks (8-12ft lengths)
- 4×4 posts for corners
- Hardware cloth (¼-inch mesh)
- Landscaping fabric (rolls of 3’x100’)
- 12-inch mending braces for long beds
Pro tip: Avoid drywall screws—they rust quickly outdoors. Use deck screws for longevity. A step-by-step raised garden bed tutorial usually recommends 2.5-inch screws for layering boards. Always measure twice before cutting to avoid wasting materials.
Budget builders can find 2x4s at Habitat for Humanity ReStores for 30% off. Plan four trips to collect all materials gradually. Total costs range $100–$300 per bed, depending on wood type and location.
Step-by-Step Building Instructions
Follow this step-by-step raised garden bed tutorial to build sturdy beds that last. Start by gathering materials like pressure-treated lumber or cedar planks, 4×4 corner posts, and screws. This how to build a raised garden bed guide ensures easy assembly even for beginners.
- Mark and cut four 2×6″ boards to your bed’s length (e.g., 8 ft) and four 2×6″ boards to the width (e.g., 4 ft).
- Assemble the base by placing two 4×4″ corner posts 8 ft apart. Attach the length boards to the posts using 3-inch screws.
- Attach the width boards to the opposite corners, ensuring corners are square by measuring diagonally (distance between opposite corners must match).
- Stack additional 2×6″ boards vertically on each side to reach desired height (e.g., three layers for 16.5-inch depth).
- Secure all joints with two screws per board, pre-drilling pilot holes to prevent splitting.
| Material | Quantity |
| 2×6″ cedar or redwood boards | 9 eight-foot planks |
| 4×4″ posts (cut to 24-inch lengths) | 4 per bed |
| 3-inch exterior screws | Approximately 60-70 per bed |
Add hardware cloth to the base if gophers are a problem. Test bed stability by gently shaking corners. For multiple beds, space them 36–48 inches apart to allow access. A how to build a raised garden bed project like this takes 30 minutes per bed once materials are cut. Redwood lasts 15+ years, while pine may need replacement in 5–7 years.
| FAQ | Answer |
| What’s the best width? | 4 feet maximum for easy center access. |
| How many screws per joint? | Two screws per board end into corner posts. |
| Can I use recycled wood? | Avoid pressure-treated lumber older than 2005 due to chemical concerns. |
Test assembly on flat ground before moving to the garden site. Adjust measurements using the 3-4-5 triangle method to confirm square corners. Follow these step-by-step raised garden bed tutorial to create beds that last decades with proper maintenance.
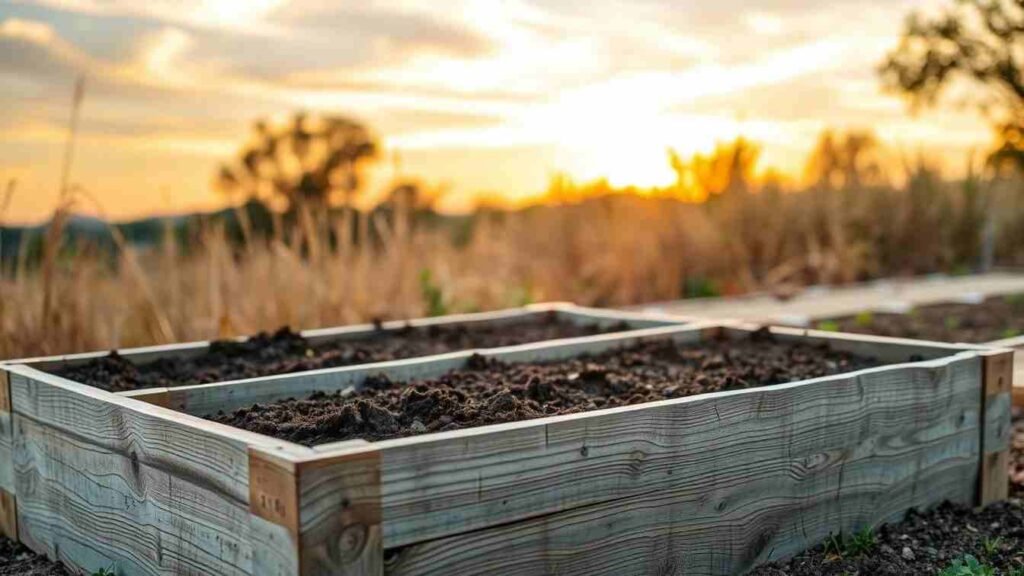
Preparing the Ground and Installation
Starting a diy raised garden beds on a budget needs good ground prep. Skipping this can make your bed unstable and waste soil. Here’s how to keep your bed level and strong.
Clearing and Leveling the Site
Check if the ground is even with a spirit level or straight board. Remove rocks and roots. Then, fill in low spots with gravel or dig out high spots.
A 4×8-foot bed needs 2-inch thick lumber stacked to 16.5 inches tall. Make sure beds are 36 inches apart for easy access—3 feet for wheelbarrows.
Weeds Barrier Options and Installation
- Lay landscape fabric or cardboard at the base to block weeds.
- Hardware cloth (½-inch mesh) prevents gophers—secure edges with 5/16-inch staples.
- For a how to build a raised garden bed guide, place barriers before adding soil.
Securing Your Bed in Place
Use ground stakes or rebar to anchor beds on slopes. For wider beds, add 2×4 corner braces. Redwood or cedar lasts longer but costs more—$90-$300 per bed.
Look for budget-friendly cedar 1x4s or recycled materials at local suppliers.
Best Soil for Raised Garden Beds
Choosing the right soil mix is crucial for your diy raised garden bed. Raised beds let you tailor the soil for your plants. Look for a mix that drains well, holds nutrients, and supports roots. Here’s how to do it:
Creating the Perfect Soil Mix
Mel’s Mix (1/3 peat moss, vermiculite, and compost) can grow 7 lbs of tomatoes per plant. For a balanced option, try the Perfect Soil Recipe: 50% topsoil, 30% compost, and 20% organic matter. Both mixes avoid heavy clay, keeping roots from getting waterlogged.
Soil Amendments for Different Plants
- Vegetables: Add compost for nitrogen. Tomatoes like a pH of 6.2-6.8 (Mel’s Mix at 5.6 may need lime).
- Flowers: Use the Perfect Soil Recipe’s higher pH (6.8) for blooms.
- Leafy greens: Mix in 2-4” of compost annually to replenish nutrients.
Soil tests are crucial—many mixes have too much phosphorus or potassium. Avoid Maryland topsoil without lab results, as regulations there are lax.
How Much Soil You’ll Need
Calculate soil volume with this formula: Length × Width × Depth. A 3’x6’x1.5’ bed holds 27 cubic feet. Divide by 3 for Mel’s Mix’s three equal parts. Buy in bulk from local stores like Farmers Exchange for cost savings.
Pro tip: Layer ingredients evenly to prevent settling. Use a 1:1 compost-topsoil mix for existing gardens.
Irrigation and Drainage Solutions
Effective irrigation and drainage are crucial for thriving raised garden beds. When planning raised garden bed plans, think about how water flows and drains. Many DIYers choose easy raised garden bed DIY methods that include irrigation from the start.
- Use drip irrigation systems to save 30-50% water compared to traditional methods. These systems deliver water directly to roots, reducing evaporation and disease risks.
- Soaker hoses work well for smaller beds. Install them under mulch for even moisture retention.
- Automated timers ensure consistent watering without guesswork. Morning watering prevents evaporation losses.
Drainage needs open soil at the base. Raised garden bed plans should include 8-12 inch heights for proper drainage. Add 1-2 inch gravel at the bottom to prevent waterlogging. Avoid compacted soil mixes to allow proper airflow.
For optimal results, follow these tips:
- Water seedlings twice daily until established, adjusting to once daily in hot climates.
- Check soil moisture weekly. Insert fingers 2 inches deep to test dampness.
- Use mulch to retain moisture and regulate soil temperature.
Products like the Garden Grid simplify drip irrigation setup with pre-drilled holes. This system cuts installation time and integrates seamlessly into raised garden bed plans. Regular inspections of drip lines prevent clogs, ensuring long-term efficiency. Pairing these strategies with proper drainage ensures plants thrive without overwatering.
Seasonal Maintenance Tips
Seasonal care keeps your raised garden beds productive all year. Regular upkeep stops decay and keeps plants healthy. Start by checking frames for rot or cracks, especially if they’re untreated wood. Use trim or posts to strengthen corners against winter’s freeze-thaw cycles.
Spring Preparation
- Test soil pH and add compost to replenish lost nutrients.
- Rake beds and plant cool-season crops like lettuce or peas early.
- Check for slugs under mulch and remove debris blocking sunlight.
Summer Care Routines
Water deeply three times a week, aiming for 1 inch of water total. Mulch with straw or shredded leaves to keep moisture in. Prune leggy plants and rotate crops to avoid pests. Use tomato cages anchored firmly to prevent wind damage.
Fall Cleanup and Winter Protection
Remove spent plants and add a 2-inch layer of compost. Sow winter rye as a cover crop at least four weeks before frost. For raised garden bed design ideas with wood frames, staple plastic lining to interiors if using untreated lumber. Mulch root zones with chopped leaves and secure beds with mid-wall stakes to resist snow pressure. Store trellises and unused tools in a dry shed to prevent rust.
Conclusion
DIY raised garden beds are great for growing veggies, herbs, and flowers in tight spots. This guide shows you how to make one from start to finish. It’s perfect for beginners. You can pick from materials like ACQ lumber or cedar for better drainage and soil control.
Building your own garden bed can save you up to 50% compared to buying one. You can also make it any size you want. A standard 8×2-foot bed is ideal for a family garden. The Magic 7 Starter Package helps prepare soil for two beds, making it easier.
Using raised beds can give urban gardeners up to 50% more space. Kids who help with gardening eat 40% more veggies. Oregon State University says beds need 6–8 hours of sunlight to grow well. Deer-resistant herbs like lavender or rosemary can protect your plants.
Begin with an 8×4-foot bed and follow this guide. DIY raised garden beds are perfect for anyone. They offer a sustainable way to grow your own food. Start today and enjoy fresh produce while living greener.