

Composting is one of the easiest and most rewarding ways to reduce waste, enrich your soil, and support a healthier planet. Whether you’re a gardening enthusiast or just looking to live more sustainably, building your own compost pile is a simple and cost-effective solution. In this guide, we’ll walk you through everything you need to know about creating and maintaining a DIY compost pile—from choosing the right location to troubleshooting common issues.
Why Start a DIY Compost Pile?
Before diving into the how-to, let’s explore why composting is worth your time:
- Reduces Waste: Up to 30% of household waste can be composted, reducing landfill contributions.
- Improves Soil Health: Compost adds nutrients, improves drainage, and enhances soil structure.
- Saves Money: Homemade compost eliminates the need to buy expensive fertilizers.
- Supports Sustainability: Composting reduces greenhouse gas emissions from organic waste in landfills.
With these benefits in mind, let’s get started on building your compost pile!
Choosing the Right Location for Your Compost Pile
Location is key to ensuring your compost pile thrives. Consider the following factors:
- Accessibility: Choose a spot that’s easy to access year-round, even in bad weather.
- Drainage: Avoid low-lying areas where water pools, as excess moisture can slow decomposition.
- Sunlight: Partial shade is ideal; too much sun can dry out the pile, while too little can slow decomposition.
- Proximity to Water Source: Keep it near a hose or rain barrel for easy watering.
If space is limited, consider using a compost bin or tumbler instead of an open pile.
Materials You’ll Need
Building a compost pile requires two main categories of materials: greens (nitrogen-rich) and browns (carbon-rich). Here’s a breakdown:
Greens (Nitrogen-Rich Materials):
- Vegetable scraps
- Fruit peels
- Coffee grounds and tea bags
- Fresh grass clippings
- Plant trimmings
Browns (Carbon-Rich Materials):
- Dry leaves
- Straw or hay
- Cardboard (shredded)
- Newspaper (non-glossy)
- Wood chips or sawdust (untreated)
Avoid adding meat, dairy, oils, or pet waste, as they can attract pests and create odors.
Discover the best soil mix for raised beds to give your plants a healthy start.
Step-by-Step Guide to Building Your Compost Pile
Follow these steps to create a thriving compost pile:
Step 1: Build the Base
- Start with a layer of coarse browns (e.g., twigs or straw) to improve airflow at the bottom.
Step 2: Alternate Layers
- Add alternating layers of greens and browns, aiming for a ratio of 2:1 browns to greens by volume.
- Greens provide nitrogen, while browns supply carbon—both are essential for decomposition.
Step 3: Maintain Moisture
- Keep the pile as damp as a wrung-out sponge. Water lightly if it feels dry.
Step 4: Turn the Pile
- Use a pitchfork or shovel to turn the pile every 1–2 weeks. This aerates the materials and speeds up decomposition.
Step 5: Monitor Progress
- Over time, the pile will shrink and develop a rich, earthy smell. Finished compost typically takes 2–6 months, depending on conditions.
Creative DIY Compost Bin Ideas
If you prefer a contained system, here are some DIY compost bin options:
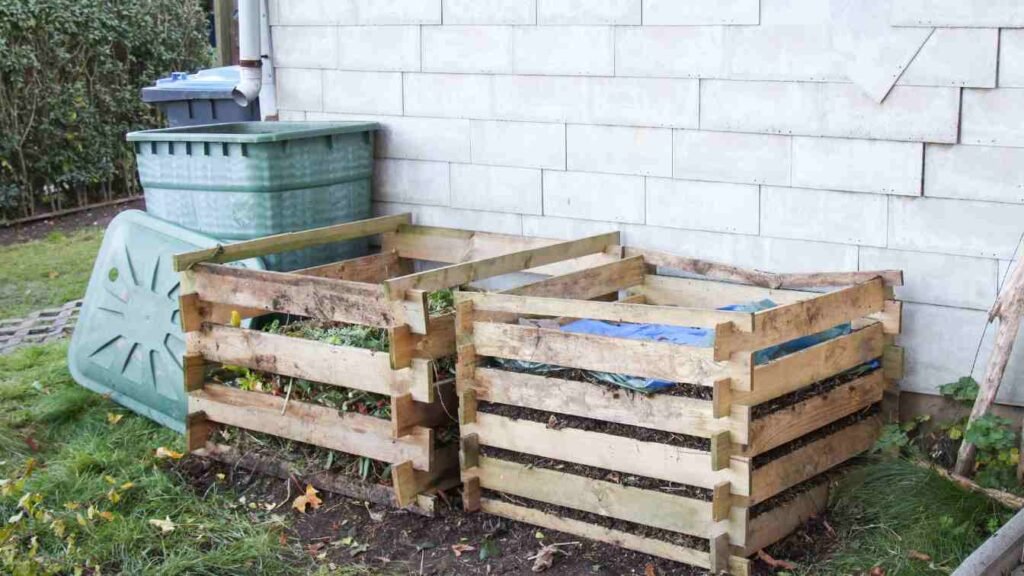
1. Pallet Compost Bin
- Build a simple square frame using wooden pallets.
- Secure the corners with screws or zip ties for stability.
2. Wire Mesh Cylinder
- Form a cylinder using chicken wire or hardware cloth.
- Secure the ends with stakes or clips.
3. Plastic Tote Composter
- Drill holes in the sides and lid of a large plastic bin.
- Perfect for small spaces or apartment dwellers.
4. Trash Can Composter
- Punch holes in a metal or plastic trash can.
- Add a lid to control moisture and odors.
Each option is affordable and customizable to fit your needs.
Tips for Maintaining a Healthy Compost Pile
A well-maintained compost pile produces nutrient-rich compost faster. Follow these tips:
- Balance Greens and Browns: Too many greens can make the pile slimy, while too many browns can slow decomposition.
- Chop Materials: Smaller pieces break down faster.
- Monitor Temperature: A hot pile (120–160°F) indicates active decomposition. Use a compost thermometer to check.
- Prevent Odors: Avoid adding meat, dairy, or oily foods, and ensure proper aeration.
Troubleshooting Common Composting Issues
Even the best-laid plans can encounter challenges. Here’s how to address them:
- Slow Decomposition: Add more greens or turn the pile more frequently to increase aeration.
- Foul Odors: Indicates too many greens or poor aeration. Add browns and turn the pile.
- Pests: Cover food scraps with a layer of browns to deter animals.
- Dry Pile: Water lightly and mix thoroughly to rehydrate.
By staying proactive, you can maintain a healthy and productive compost pile.
Using Your Finished Compost
Once your compost is dark, crumbly, and smells earthy, it’s ready to use! Here are some ideas:
- Garden Beds: Mix compost into soil to improve fertility and structure.
- Potted Plants: Use as a top dressing or mix into potting soil.
- Lawn Care: Spread a thin layer over grass to nourish the soil.
- Mulch: Apply around plants to retain moisture and suppress weeds.
Environmental Benefits of Composting
Composting isn’t just good for your garden—it’s good for the planet. Here’s how:
- Reduces Methane Emissions: Organic waste in landfills produces methane, a potent greenhouse gas.
- Conserves Resources: Compost reduces the need for chemical fertilizers and pesticides.
- Supports Biodiversity: Healthy soil fosters beneficial microbes, insects, and plants.
Conclusion: Start Your DIY Compost Pile Today
Building a DIY compost pile is a simple, eco-friendly way to turn kitchen scraps and yard waste into “black gold” for your garden. By following the steps outlined above, you can create nutrient-rich compost that benefits your plants and the environment. Whether you choose an open pile or a DIY bin, the key is consistency and care